How to create a new lending pool
This guide explains how to create new lending pools using the pool creation flow.
Pools can also be created directly through the protocol contracts (e.g. via a block explorer).
Requirements
- Starknet wallet: A multisig setup is strongly recommended for the curator role to minimize risks.
- Small token amount: A small amount of the token is required to seed the pool (at least 1,000 units in the smallest denomination, such as 0.001 USDC for a USDC pool). This amount is burned to prevent share inflation attacks and ensure pool integrity.
Step-by-step Guide
Click the blue Create new pool button on the top right of the Pools page.
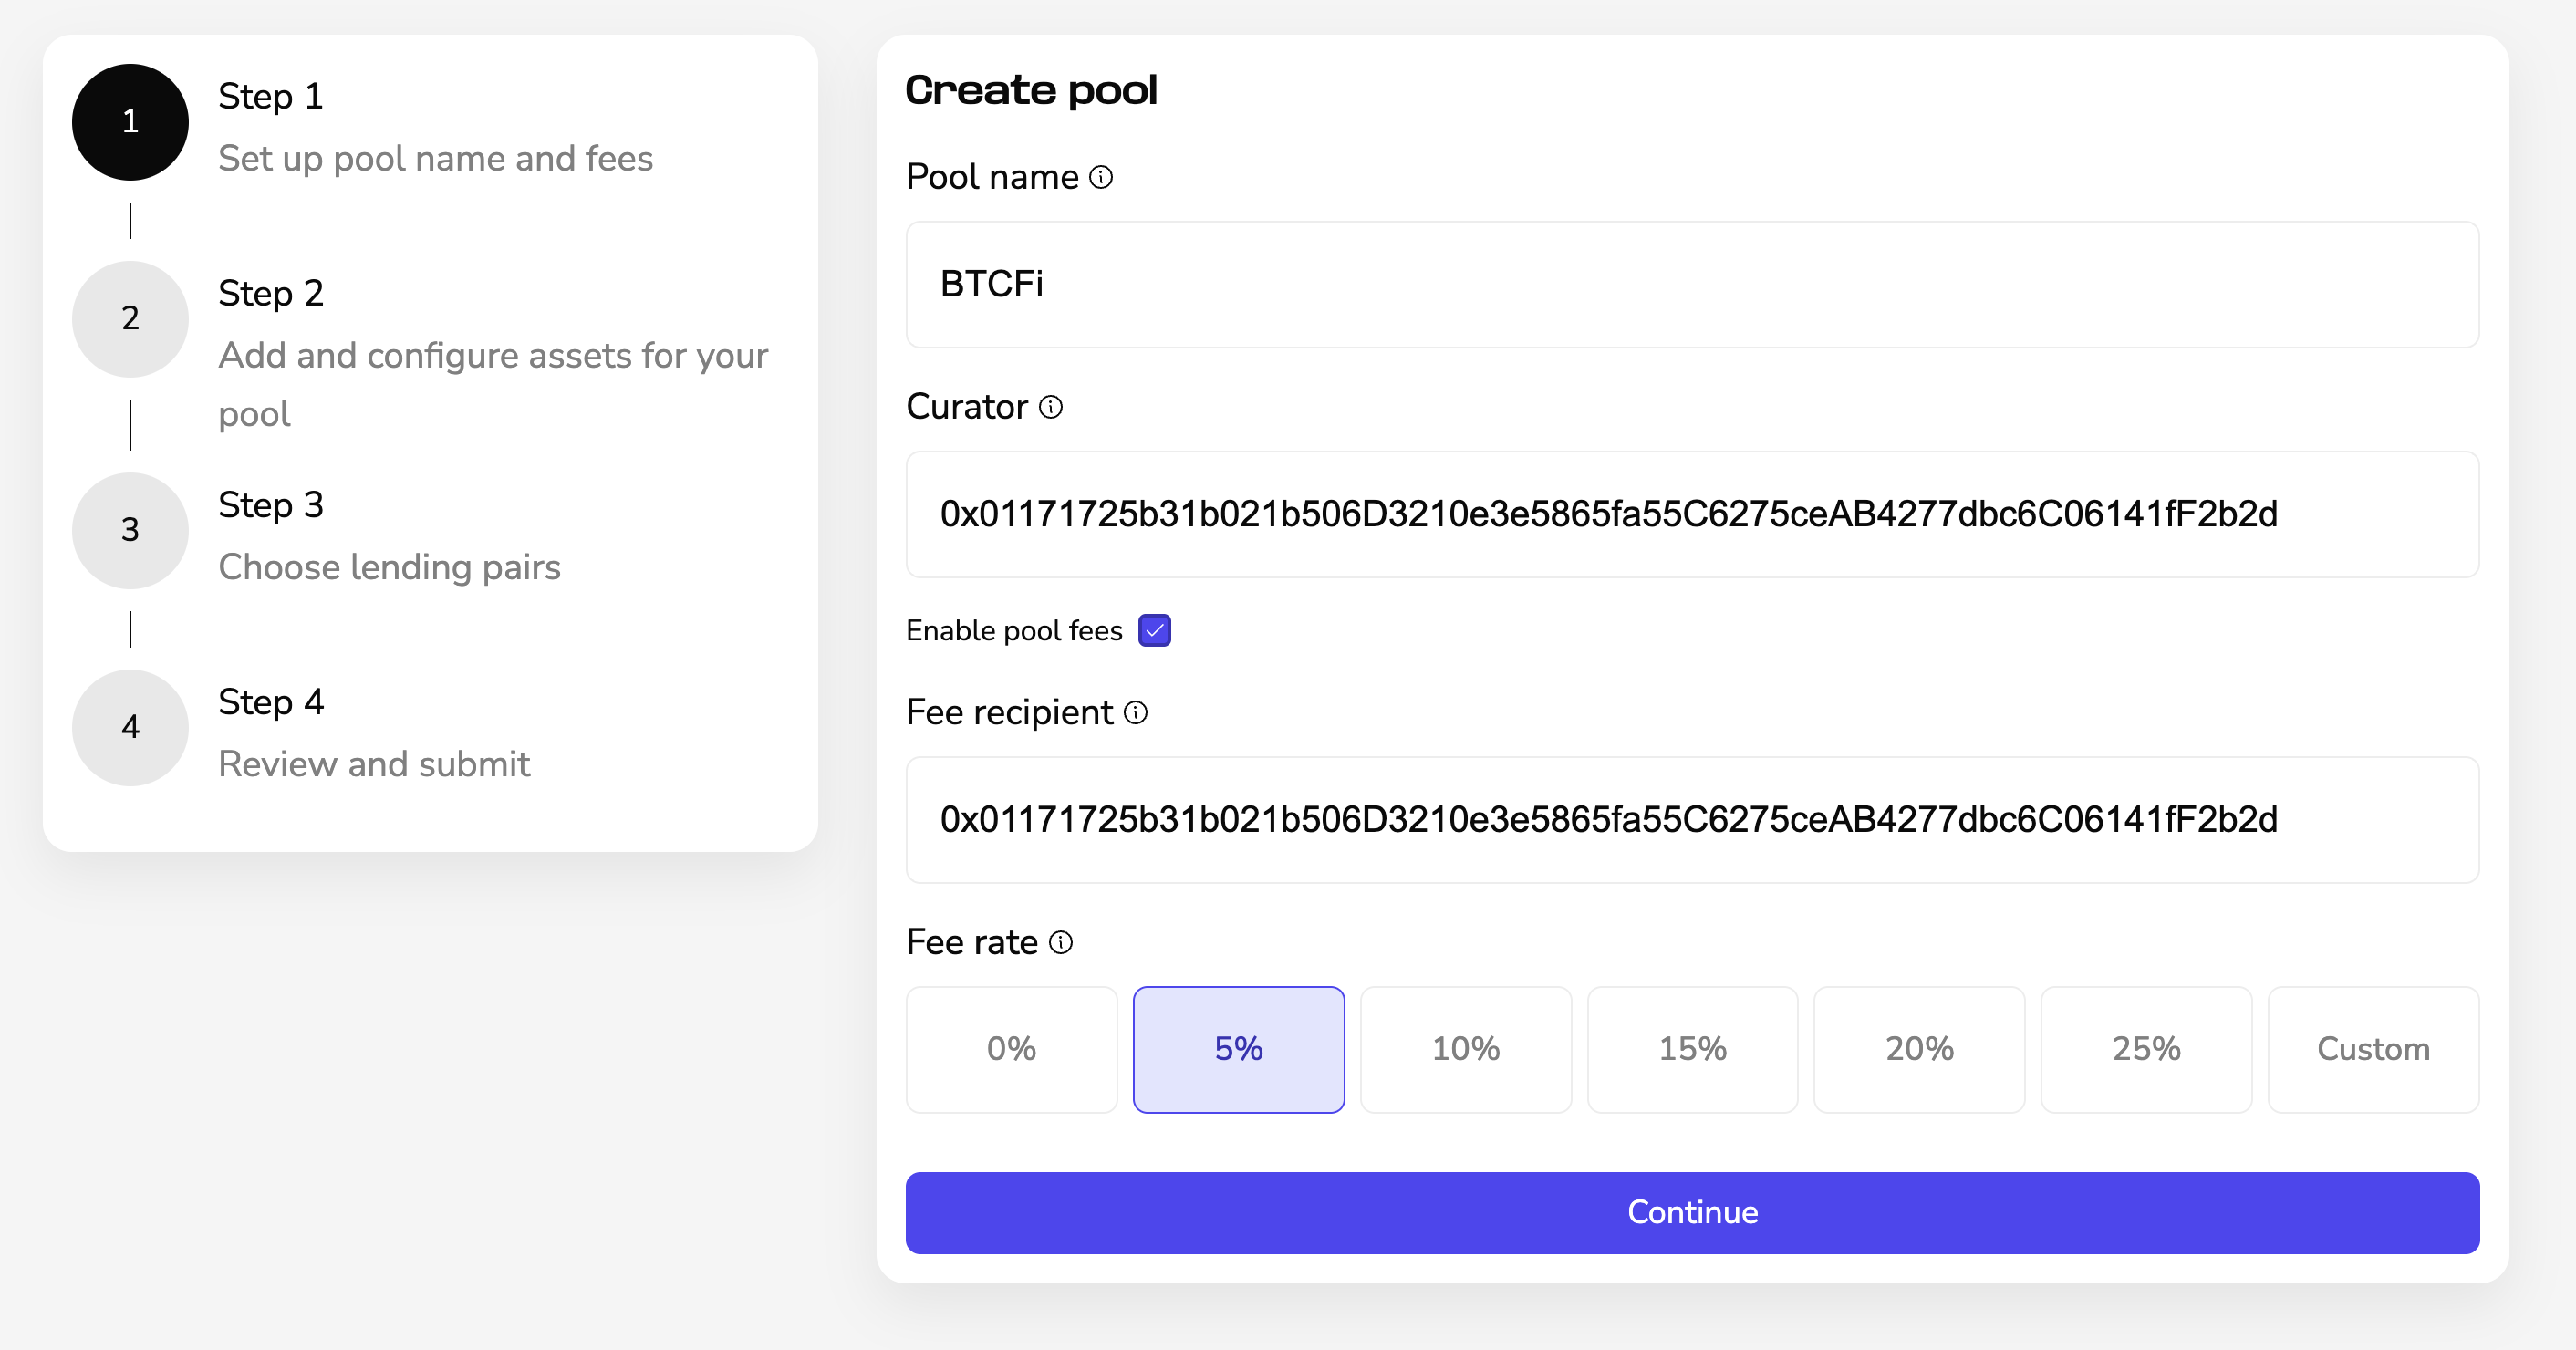
1. Set up Pool
- Enter a name for the pool.
- Enter the Starknet wallet address that will be the curator (pool owner).
- Enable or disable pool fees.
- If fees are enabled, set the fee recipient and fee rate.
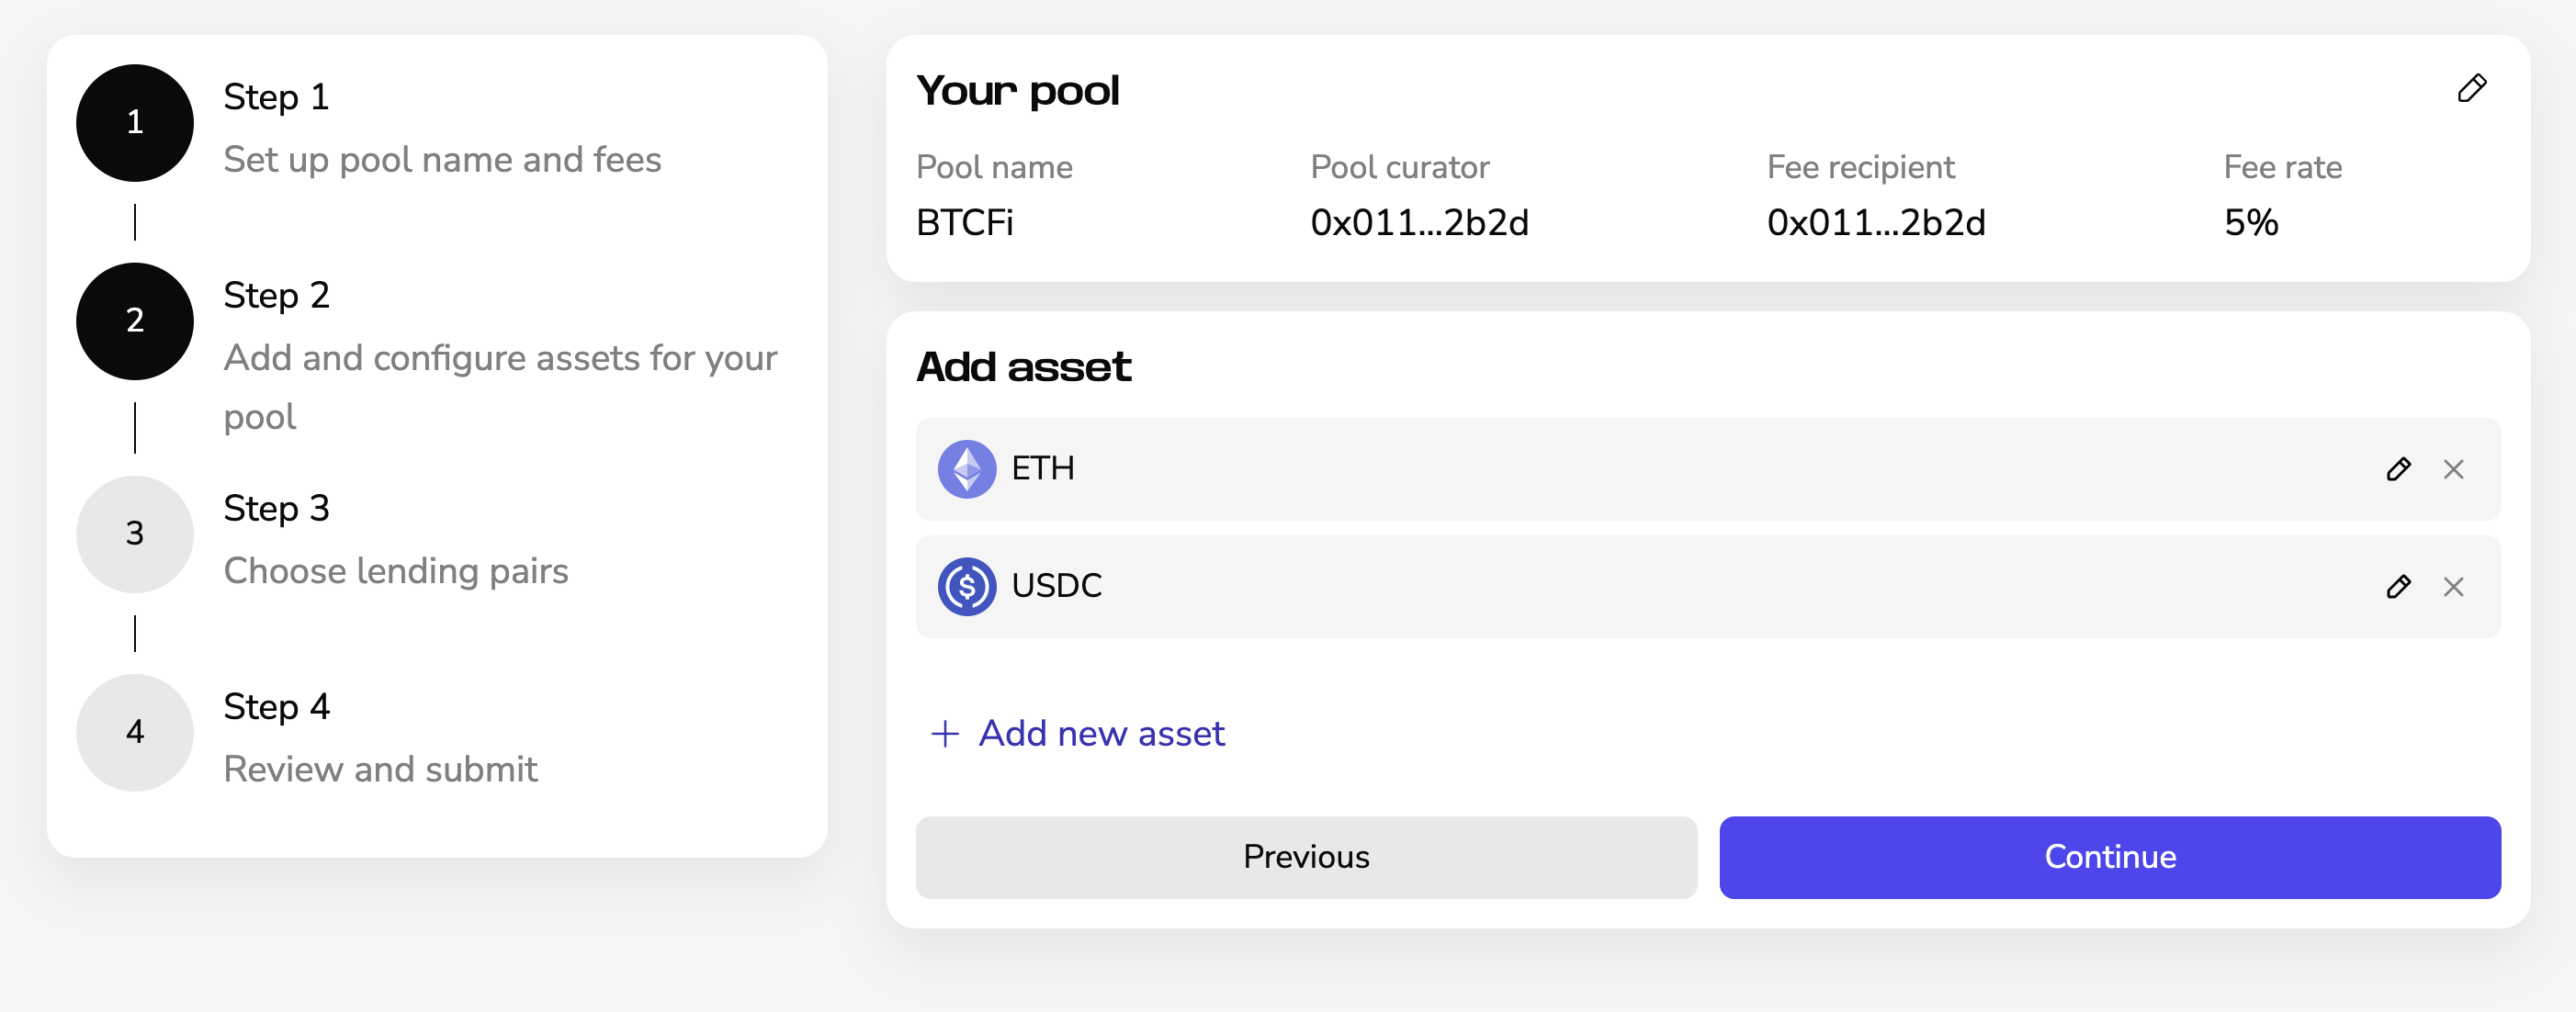
2. Add and Configure Assets
Add the assets that should be available in the pool.
For each asset, configure:
- Debt floor
- Max utilization
- Interest rate model parameters
- vToken name and symbol
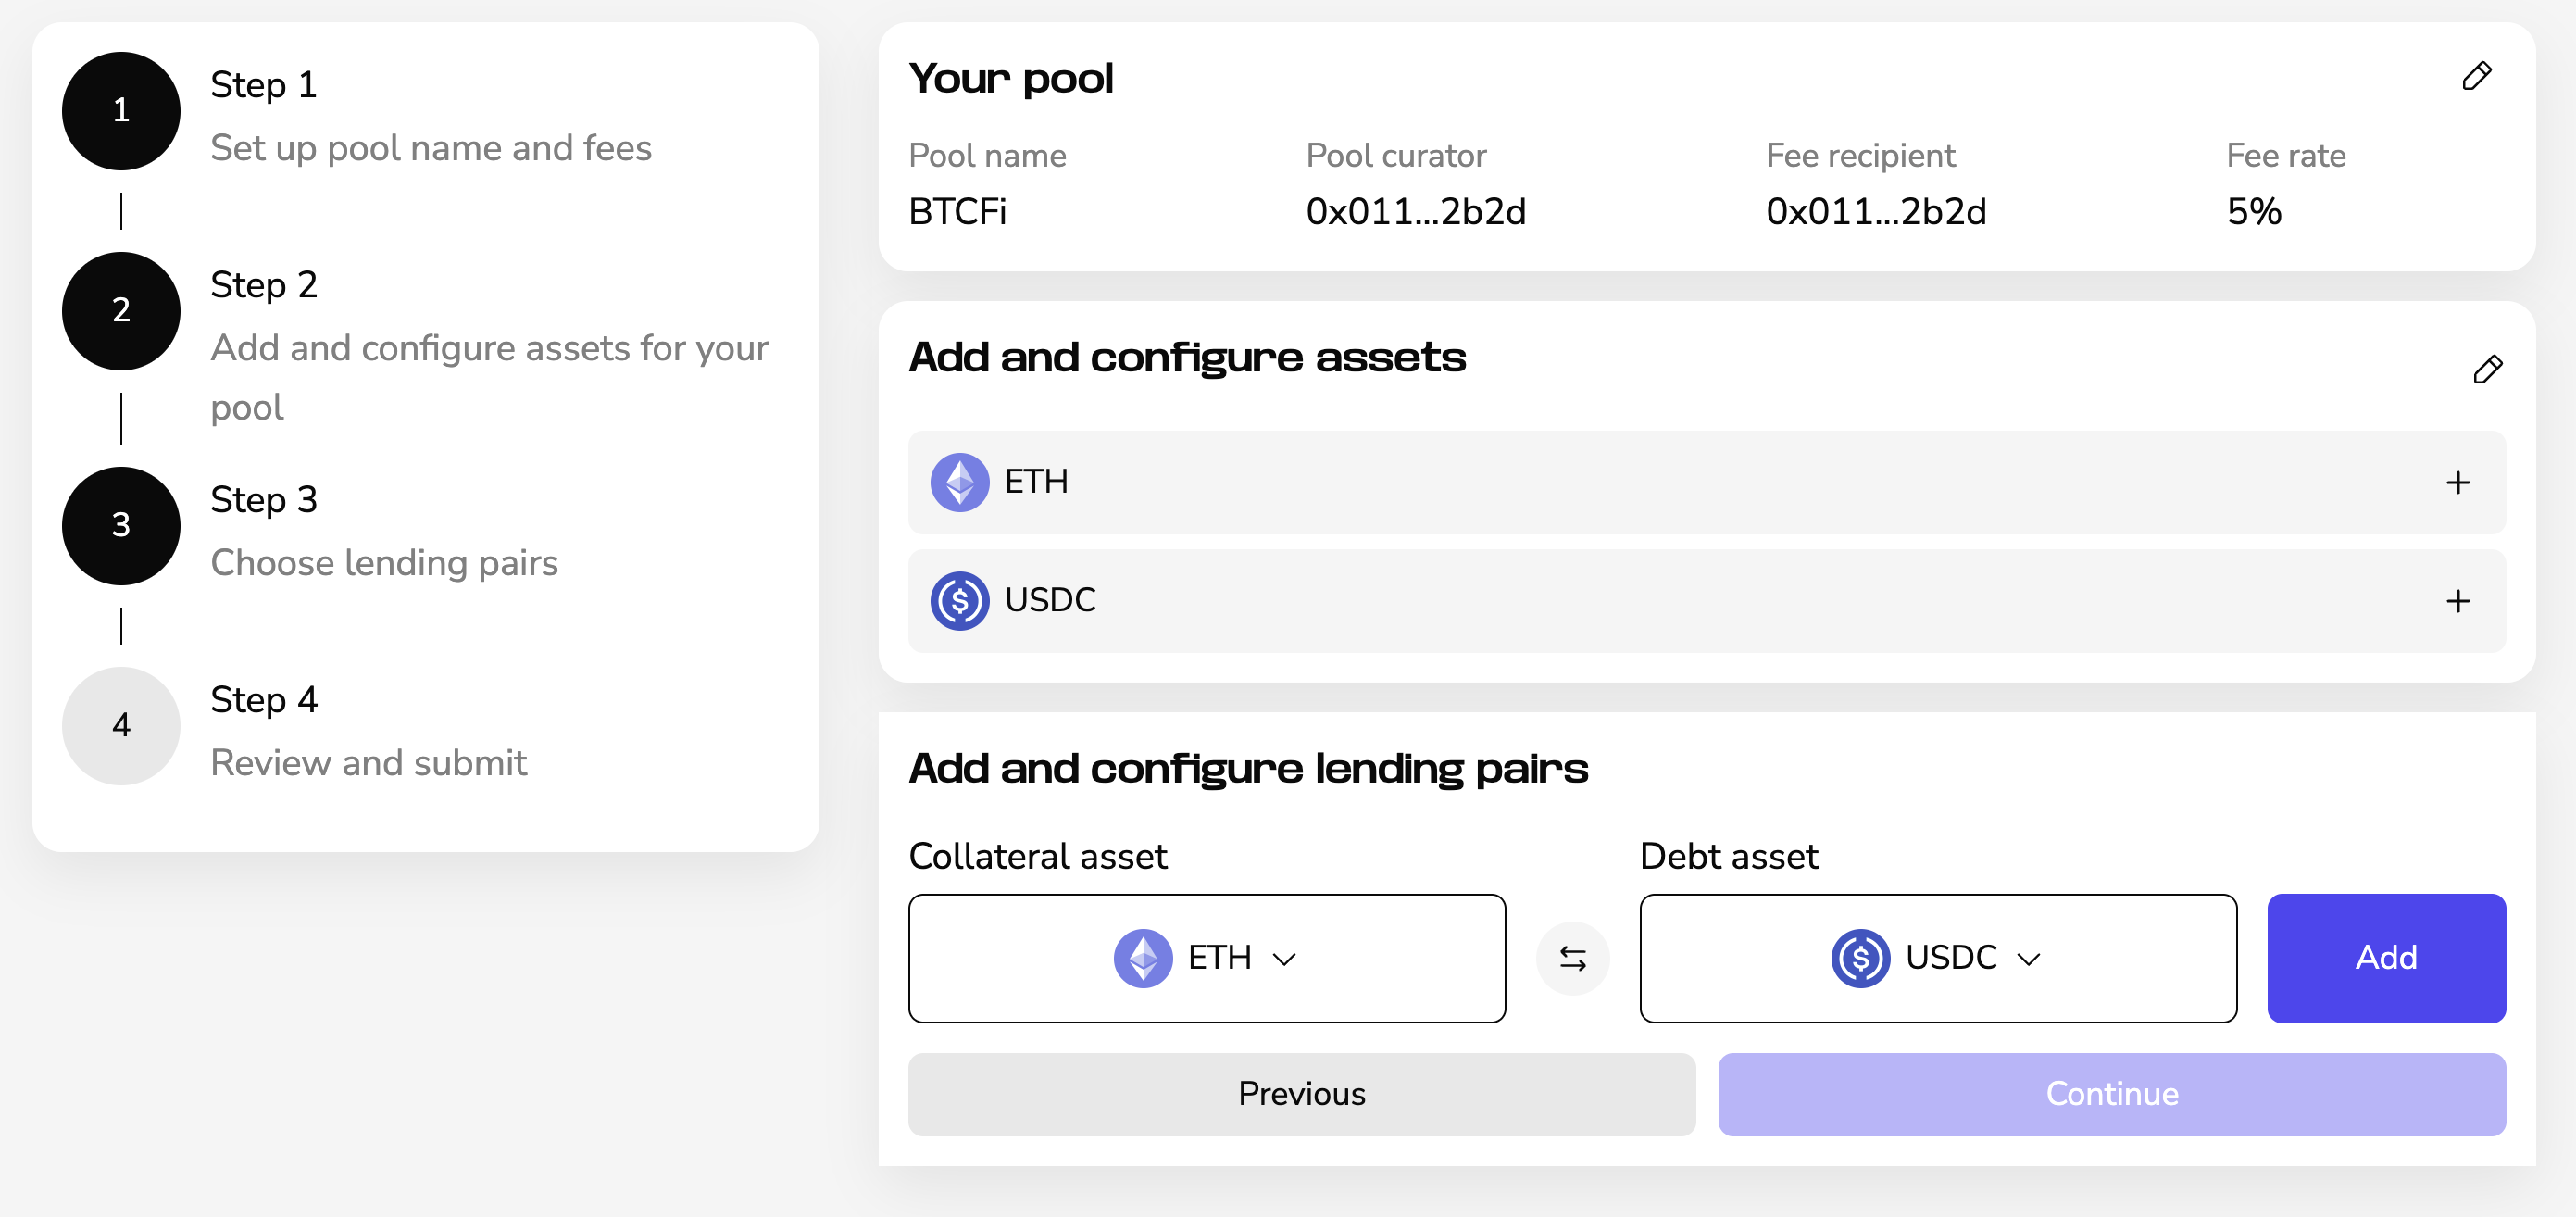
3. Configure Lending Pairs
After adding the assets, configure the lending pairs by selecting a collateral asset and a debt asset.
For each lending pair, configure:
- Liquidation loan-to-value (LTV)
- Liquidation discount
- Debt cap
Repeat this process for any additional lending pairs.
4. Review and Submit
Check all settings and verify that everything is correct.
When everything is correct, click Create Pool and confirm the transaction in your wallet. Once the pool is created, the curator must claim ownership via the contract (see next section).
Reminder: A small amount of the token is required to seed the pool (at least 1,000 units in the smallest denomination, such as 0.001 USDC for a USDC pool). This amount is burned to prevent share inflation attacks and ensure pool integrity.
Accept Curator Ownership
After creation of the pool, the ownership must be claimed via a blockexplorer like Voyager. Open the address of your pool, click on Write Contract and connect your wallet.
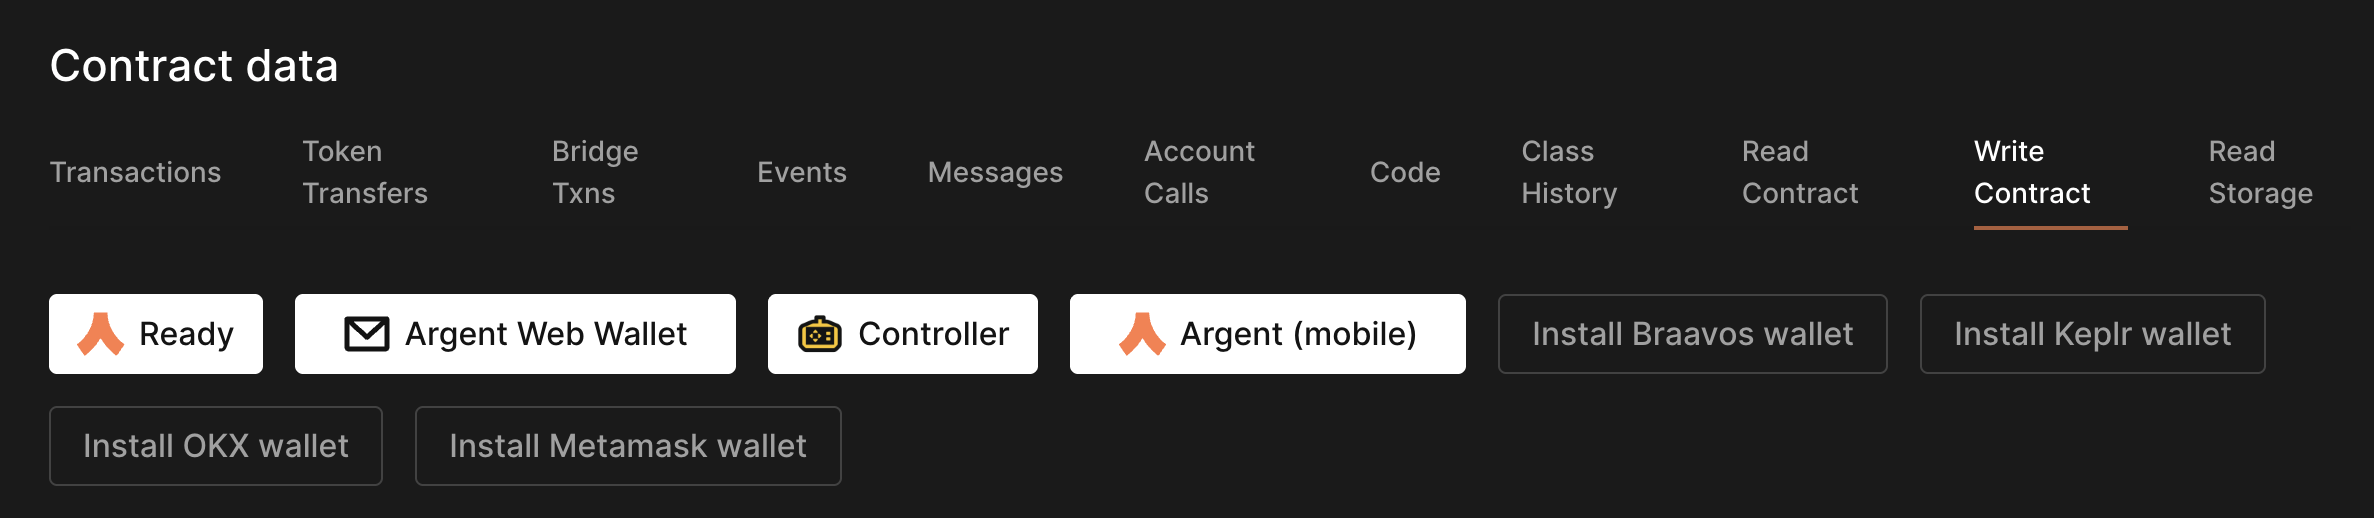
Scroll down to 15. accept_curator_ownership, click on Transact and confirm the transaction in your wallet.

Ownership of a pool can be transferred to another account. As an added security layer, the new owner must manually accept ownership via the contract.